
Harness Your Business Knowledge With Project Templates
Harness Your Business Knowledge With Project Templates
Challenges of manual project creation
Benefits of standardized templates
Managing templates in Klient
Defining scope and scheduling resources
Creating projects using templates
Consistency: Standardized templates ensure uniformity across projects.
Time Efficiency: Reduces the time required to set up new projects.
Error Reduction: Minimizes the risk of missing tasks and dependencies.
Resource Management: Facilitates accurate resource allocation and planning.
Continuous Improvement: Integrates lessons learned into new projects.
Introduction to Project Templates (0:00)
Greetings, everyone! Dominic, for another ‘How I Solved It with Klient’. On this sunny day, I wanted to discuss harnessing your business knowledge using project templates.
Challenges of Manual Project Creation (0:13)
First, if you’re not using templates and creating projects manually, you’re probably having different structures, phases, and tasks across the projects, and maybe it leads to confusion and inefficiencies. It also creates some higher risk of errors such as missing tasks, incorrect timelines, or overlooked dependencies due to manual setup. That manual setup is time-consuming and most likely leads to misalignment between sales and delivery, delaying the project start. As the project structure varies from one implementation to another, it also makes tracking and reporting more difficult. Ultimately, managing a growing number of projects becomes cumbersome without standardized templates, and it ultimately would be a scalability issue.
Benefits of Project Templates (1:04)
So how can we help using project templates? It will standardize your project structure, ensuring that all templates include common phases and tasks relevant to most projects, and maintaining uniformity and clarity across the projects. Including key details: defining scopes, objectives, and deliverables within your templates, will help alignment between sales, delivery, and the customers. Clearly defining the roles and assigning responsibility within the templates will increase efficiency for the resource planning and their utilization. Creating templates for different project types, small, medium, large, or by industry, each having their tailored structure to meet the specific requirements for each of them. Finally, implementing a feedback mechanism to gather input from project teams about the effectiveness of the delivered projects. Reviewing project structures should be part of your project closeout and lessons learned process.
Managing Templates in Klient (2:03)
So, let’s see how templates are managed in Klient and the core information they should contain. A Klient project can be identified either as a project or a task template, simply marking one of those two checkboxes. A project template will include the information from the envelope, billing type, rate cards, and all relevant information. A task template will be used only for its tasks and related information. The work breakdown structure can be more or less detailed depending on the project size and information on tasks are key. The name, the estimated hours, whether it is billable or not, are all key information we should have. The dependencies and the duration of each task are also quite important. I like to start with a milestone and end with a milestone for better maintenance later.
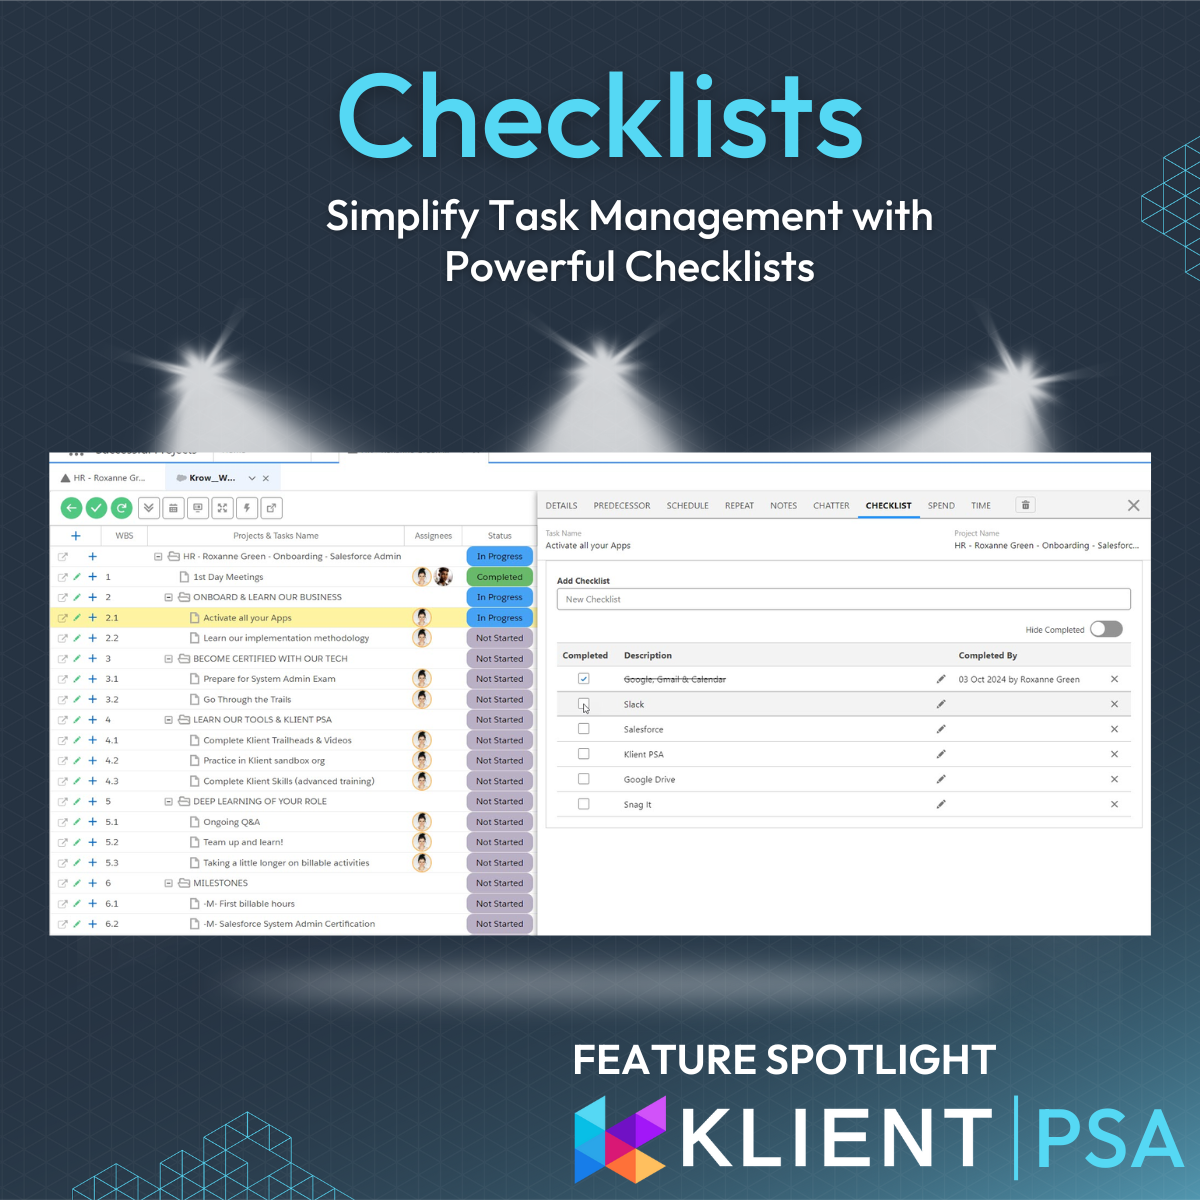
Defining Scope and Scheduling Resources (2:52)
The scope should be defined in the description field, providing clarity to your team and the customer. A checklist is also another great feature to get more detailed information on what needs to be completed. A resource should be scheduled, now in the place as a placeholder, assigning some hours, and if we have more than one resource, we can also use the assignment grid for distributing the hours to each of our resources.
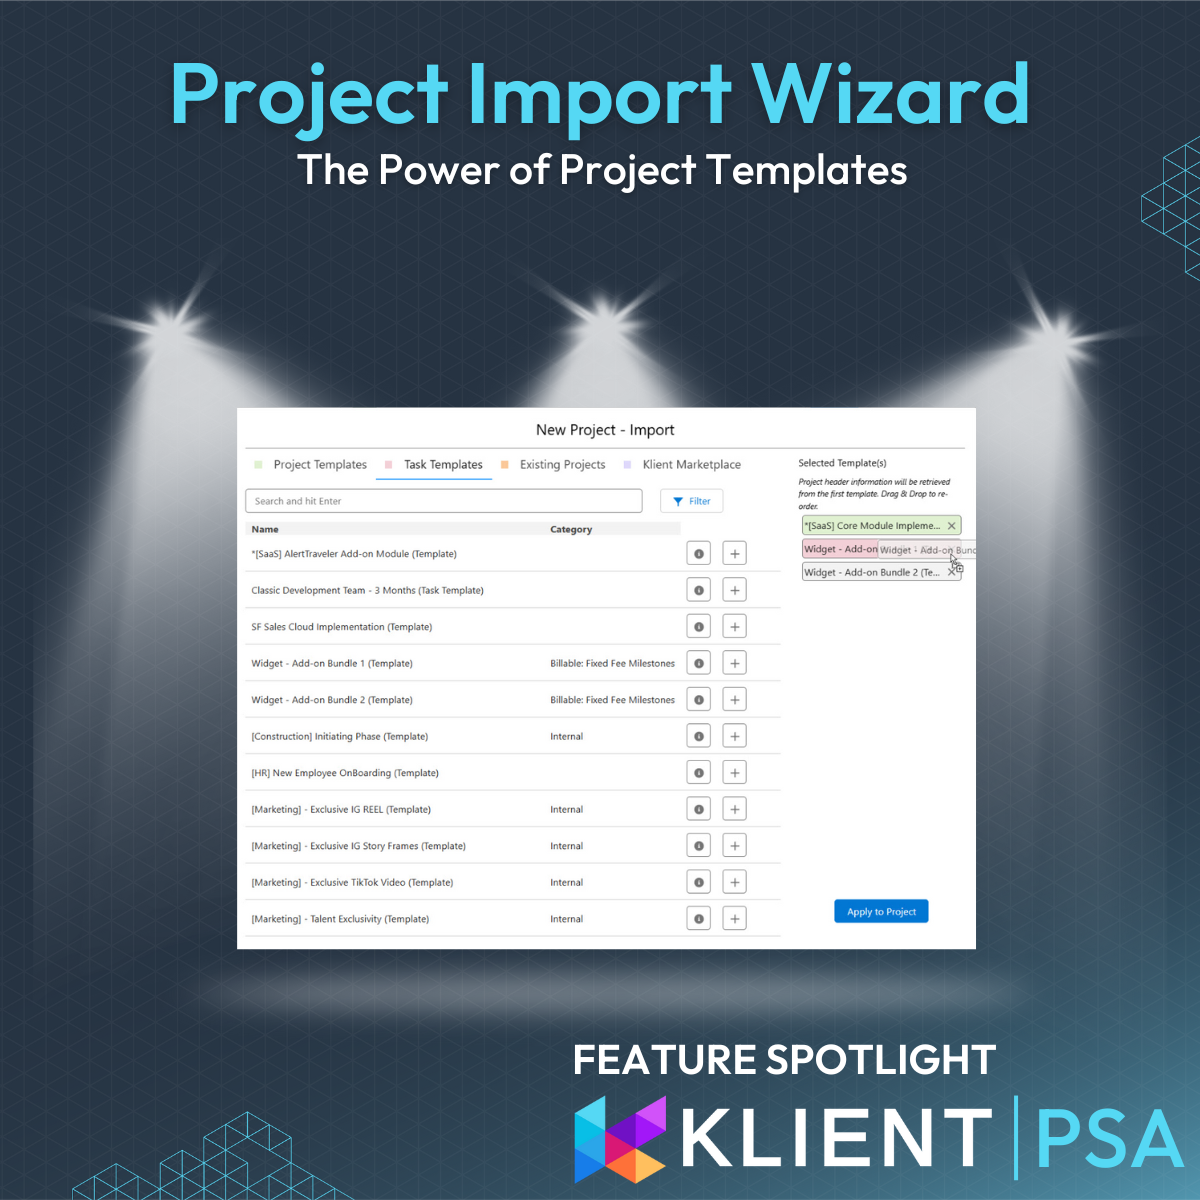
Using Templates to Create Projects (3:22)
Once our project is set and maintained, we can use it to create a new project, either by using a single project template, leveraging the information from the project envelope, or combining several task templates, using an assembly of those to create our project.
Benefits of Using Project Templates (3:41)
Now that we’ve seen how easy it is to set up a Klient project and all the information it should be comprised of, why not start harvesting the benefits right now? First, it will bring consistency to your projects by standardizing the format, making it easier to manage and facilitating new employees’ onboarding. It will also bring time efficiency by reducing the effort required to set up a new project. It will reduce the risk of missing important tasks and dependencies, ensuring all critical elements are included from the start. It will improve resource management by facilitating accurate resource allocation and planning, ensuring the right resource is working on the right task at the right time. Leveraging successful projects by incorporating proven strategies into methodologies and new project templates. Finally, it allows for continuous improvement of project processes by integrating lessons learned and feedback from successful projects into your templates.
Conclusion and Call to Action (4:43)
So why not start using it now? If you have any questions or comments, it’s always a pleasure to support you. Reach out to [email protected] for any questions or comments. Thanks! Have a great day.
Found this helpful?
Here are some similar videos in our serie How I Solved It with Klient


Subscribe to our channel
Visit and subscribe to our channel for more insights on leveraging Klient to solve your business challenges.