The Efficiency of Project Templates
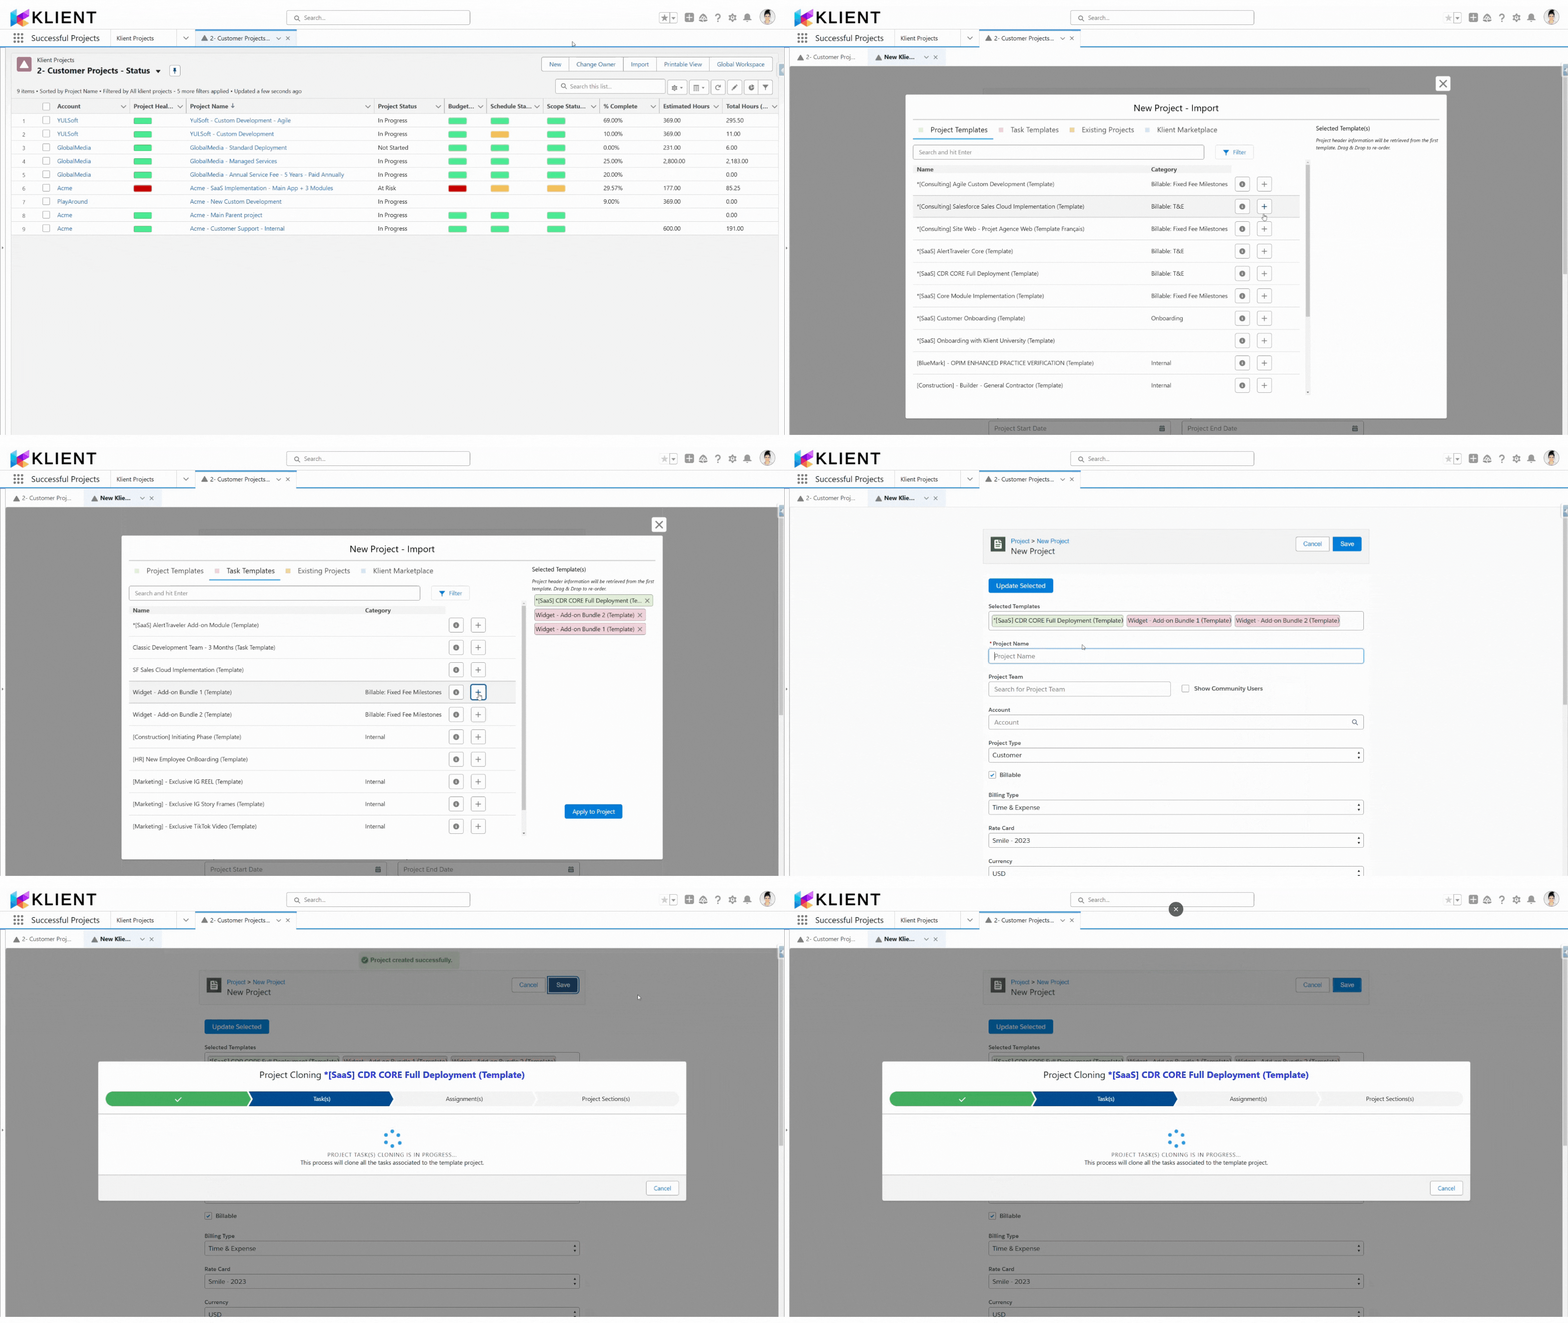
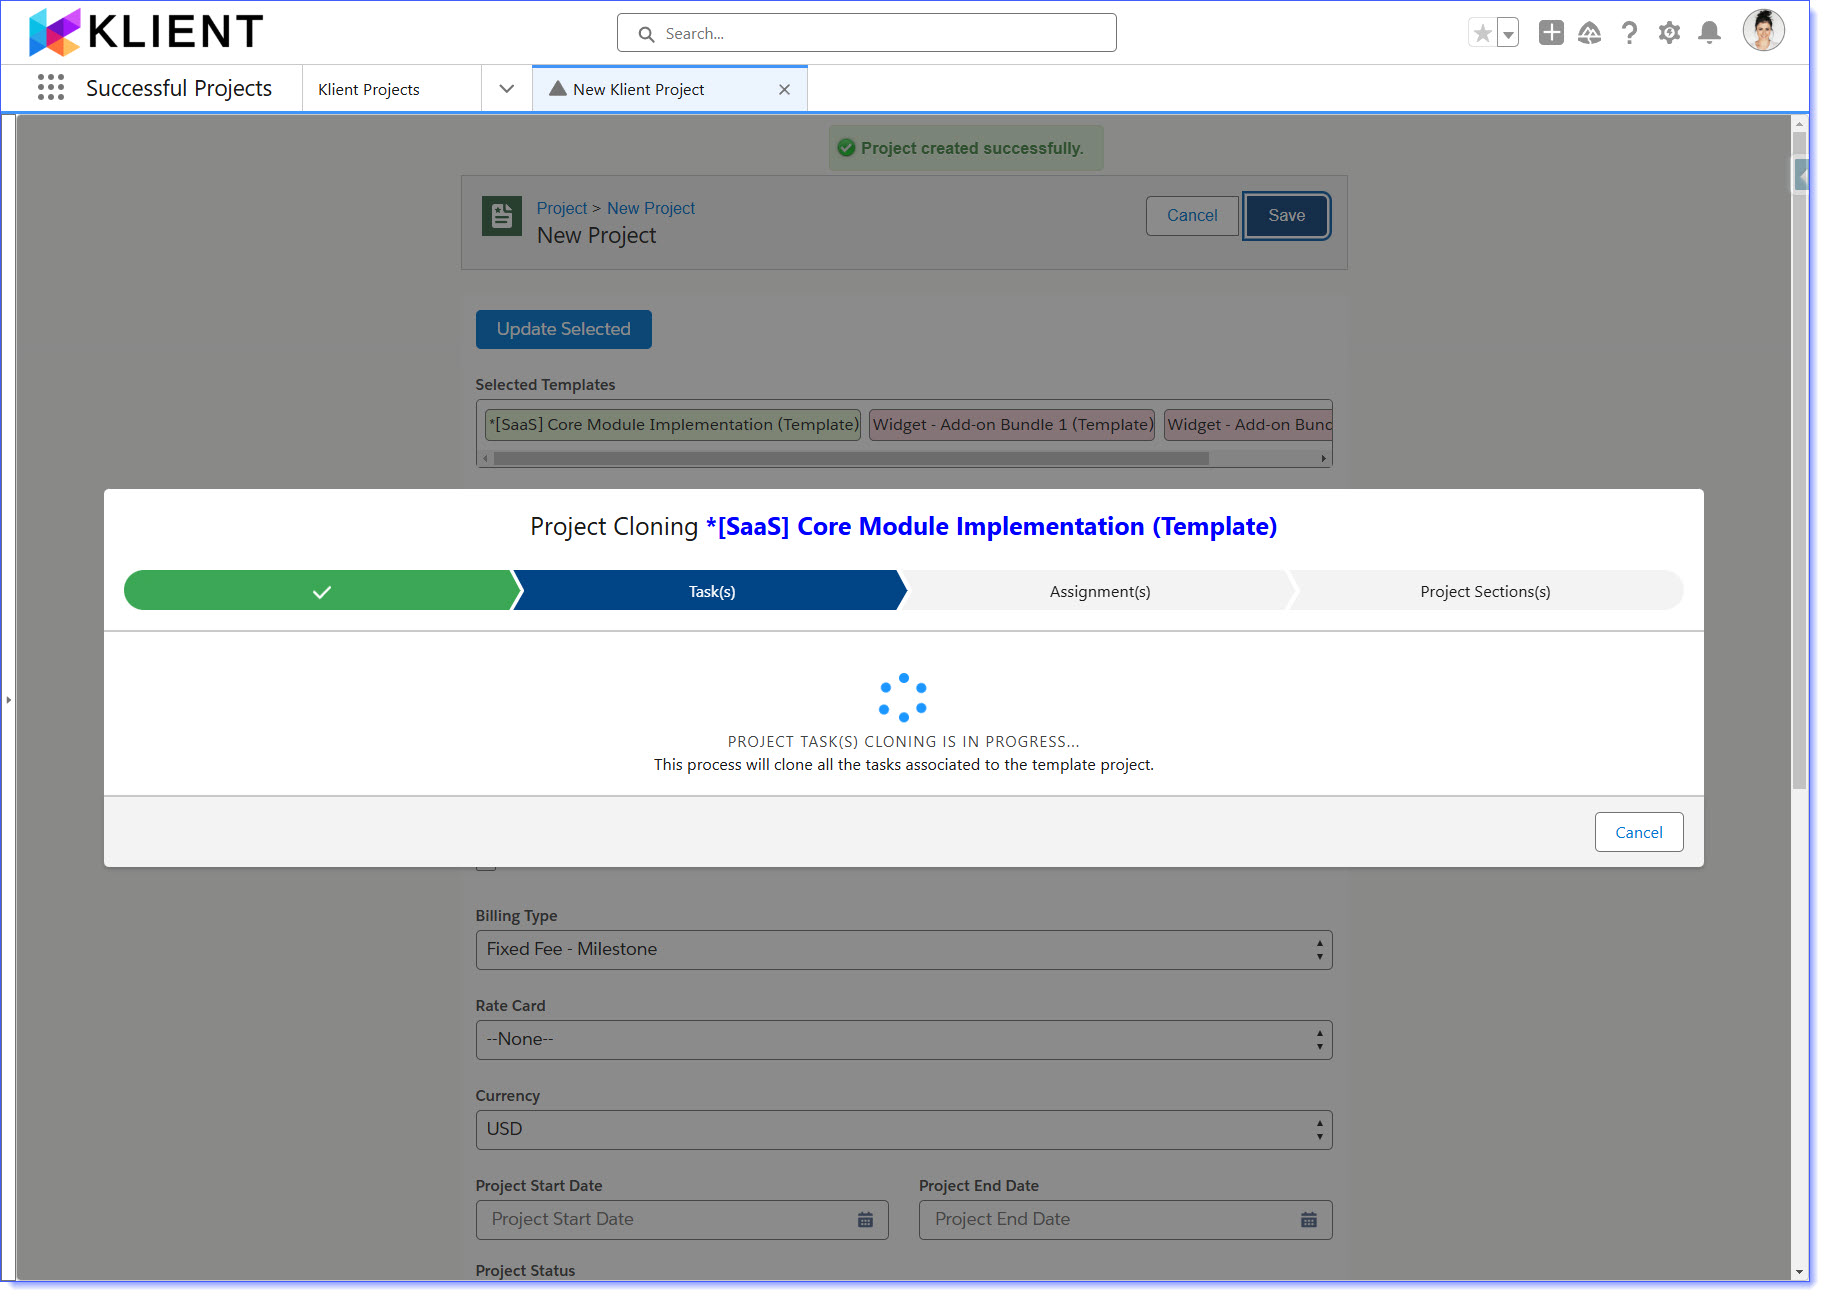
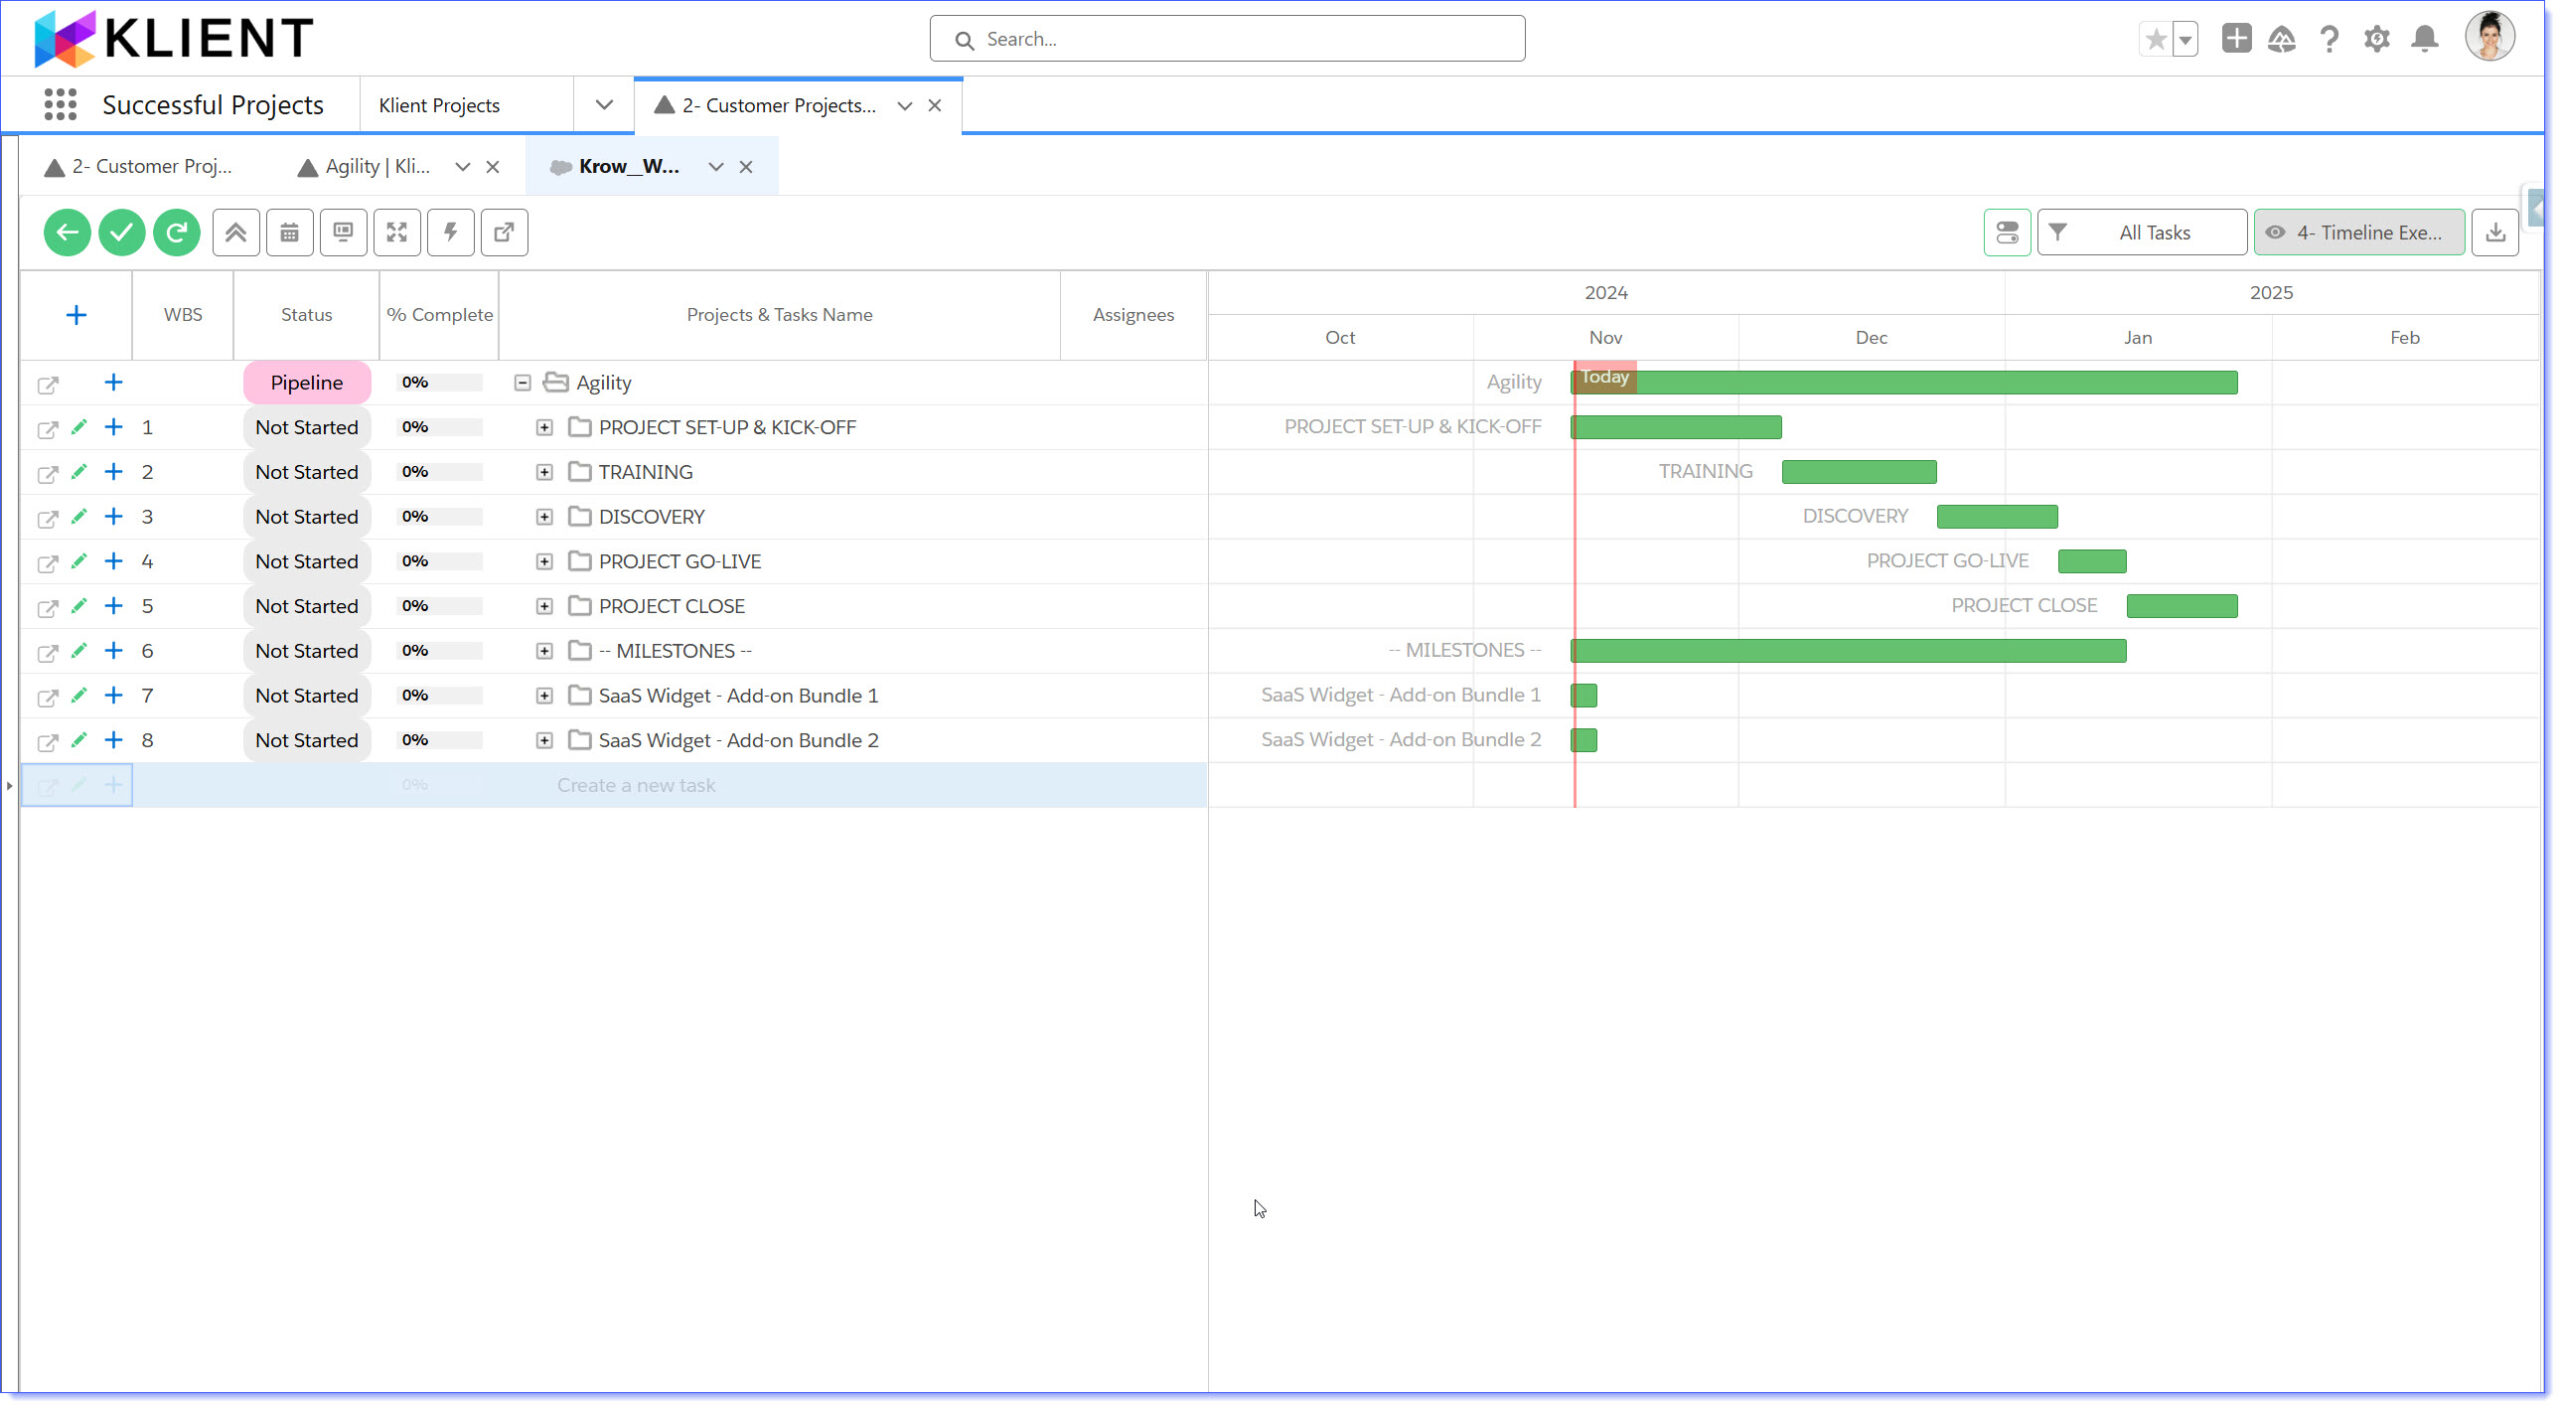
With Klient’s Project Import Wizard, setting up new projects is faster and more efficient. This powerful tool lets you load and customize project templates, saving time and ensuring consistency across your projects. You can use the Project Import Wizard to start a new project from scratch or to add tasks to an existing project, making it versatile for different project stages.
The Project Import Wizard imports the following key elements:
Project details
Tasks with descriptions and estimated hours
Checklist for structure and guidance
Resource or placeholder assignments for accurate forecasting & rate management
Task dependencies for easy manipulation and workflow control
Why Use the Project Import Wizard

Skip starting from scratch—select templates you’ve built to launch projects with a solid, proven structure.

Add multiple task levels, reorder bundles, and tailor templates to meet each project’s unique needs. This functionality effectively transforms the wizard into a project CPQ (Configure, Price, Quote) tool.

Templates provide a reliable foundation, aligning tasks, deliverables, and timelines with your standards, ensuring consistent quality in every project.

Drawing from past successful projects, you can scope and quote with ease, knowing it seamlessly feeds into your forecasts.
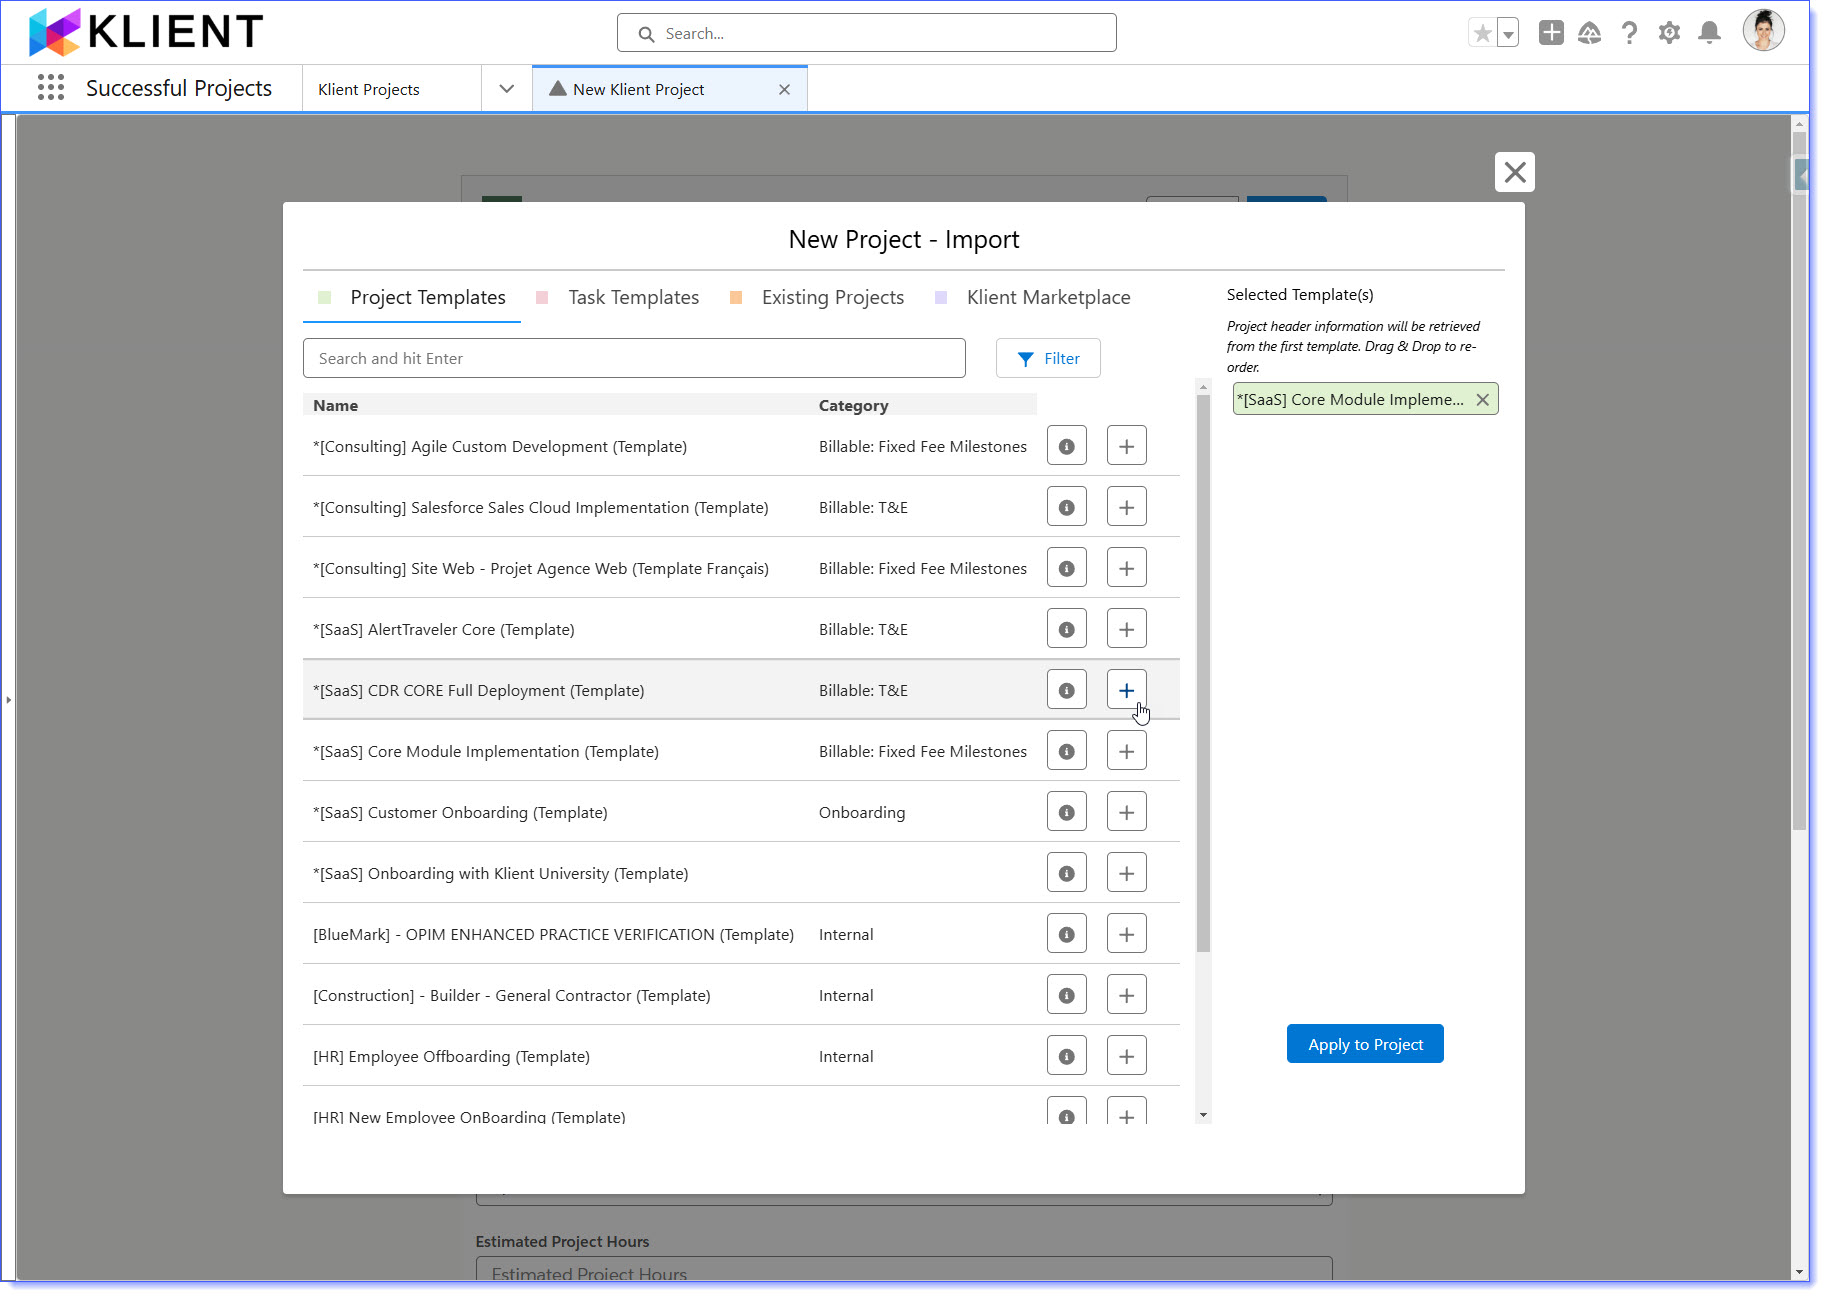
The Anatomy of the Project Import Wizard
The Project Import Wizard has two main sections:
Import Sources (left side): Organized under four tabs, this is where you’ll select your source projects.
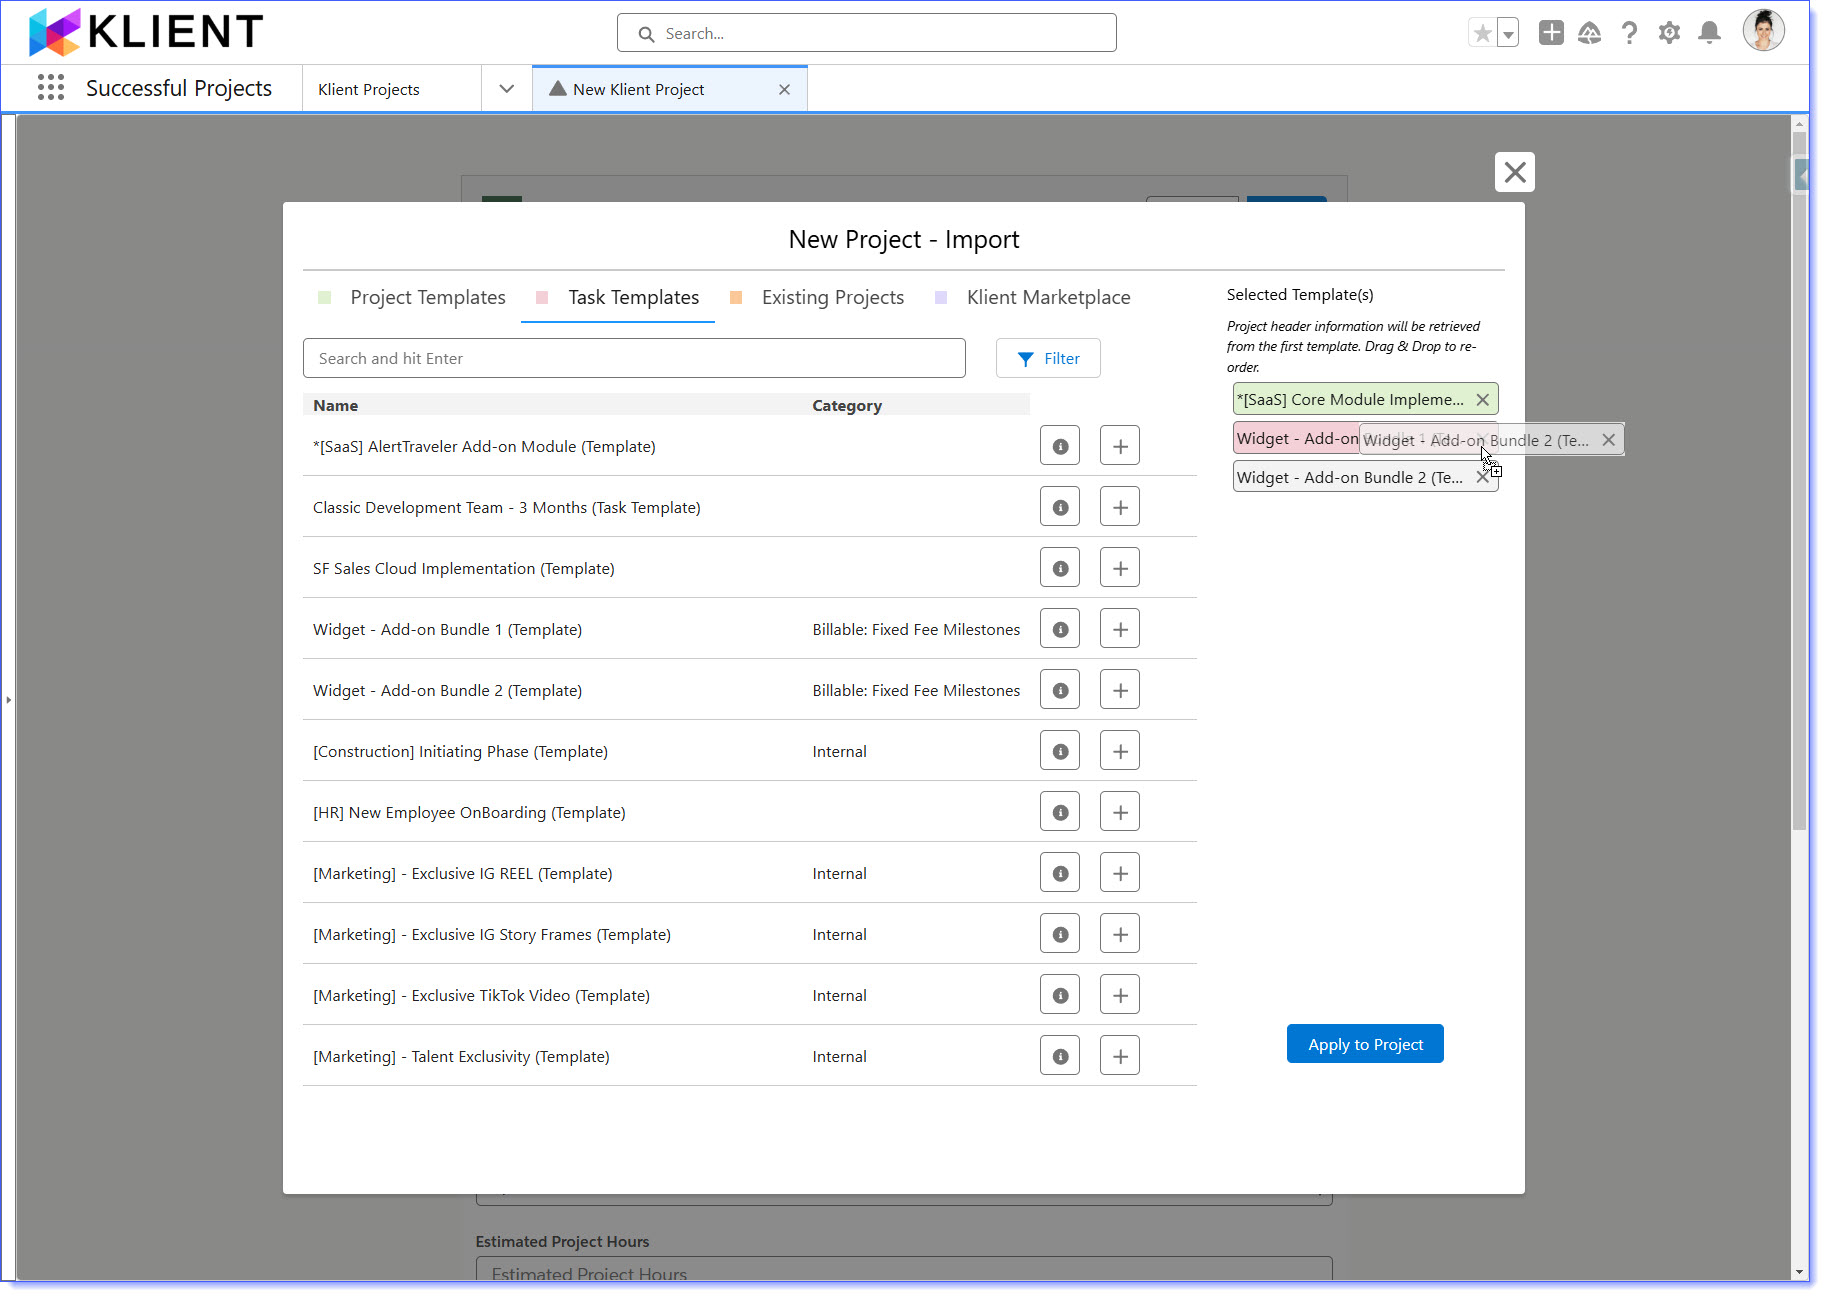
Project Ordering (right side): Displays projects selected from your source, where you can reorder them by drag and drop.
The first project highlighted in green becomes the template for the new project’s main details, including description, attributes, and rate card. Subsequent projects are loaded in order. You can import from four sources:
Project Template: Start with a strong Project Template.
Task Template: Combine multiple Task Templates to create a single project, and even insert a Task Template into an existing Klient Project. Task Templates are similar to Project Template but do not include any project-level parameters.
Existing Project: Take any good running project. You might need to reset a few status and change resource to placeholder but it’s worth it to start with a good successful project.
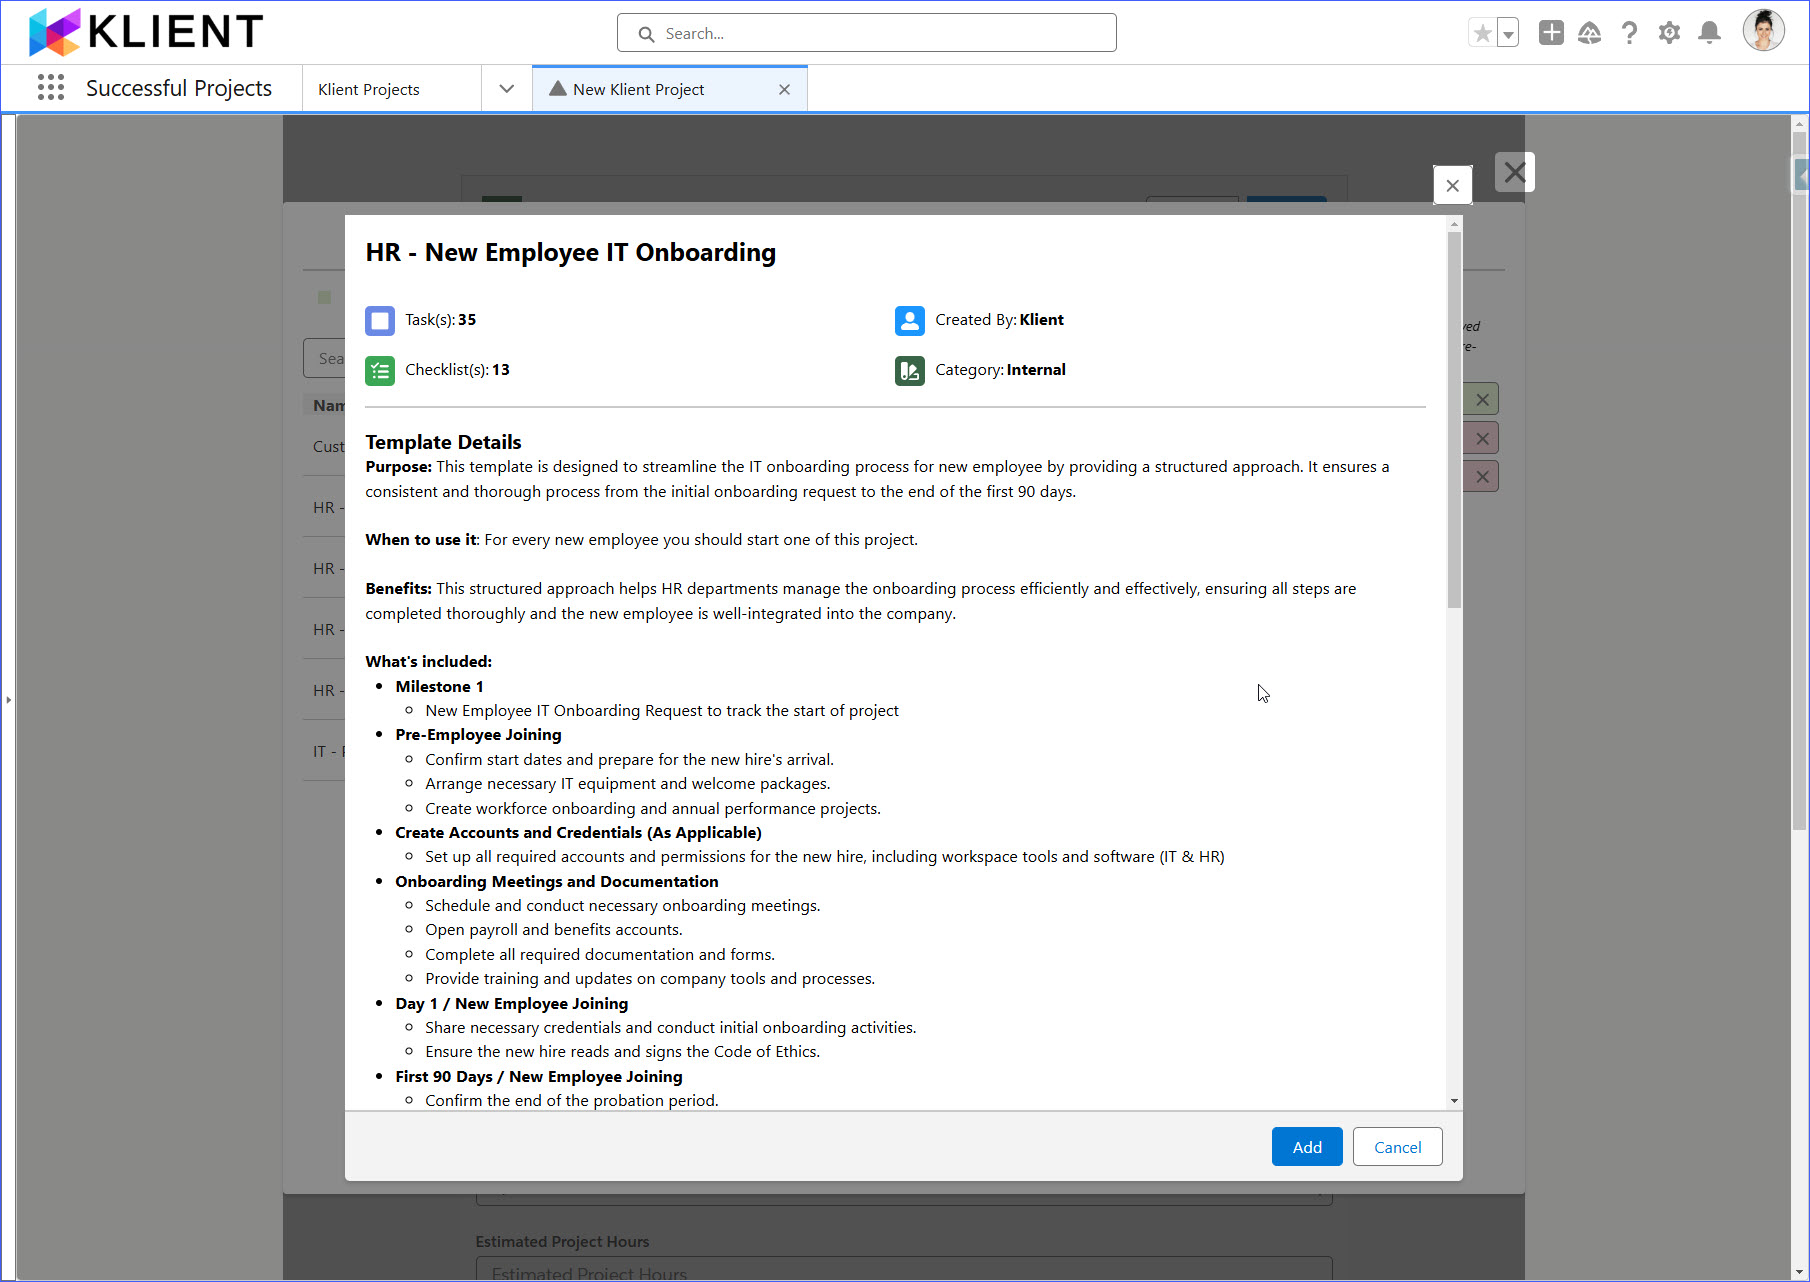
Klient Marketplace: Use our Klient Marketplace templates to jumpstart your use of Klient PSA. These templates—used by the Klient team over the years—help structure and streamline various business processes, making it easy to hit the ground running.
 How We Do It at Klient
At Klient, we don’t just use templates for customer projects. We have templates for all major processes in our business. From Employee Onboarding to IT Onboarding & Offboarding, Customer Support, Software Development, and even our SOC2 Type 2 Control Matrix — we’ve built templates to streamline operations across the board. These are the same templates available to you in our Marketplace.
How to Use the Project Import Wizard
While you can use an existing project to start a new one, creating robust project templates allows you to refine and improve over time.
1- Build a Project Template
Set up a project with all relevant details—project attributes, tasks with descriptions and estimates, checklists, and placeholder resources. Organize it with parent sections, use caps lock, and add emojis in task names for clear identification.
2- Mark as a Template
On the project record, mark it as a template by checking:
Project Template
Task Template
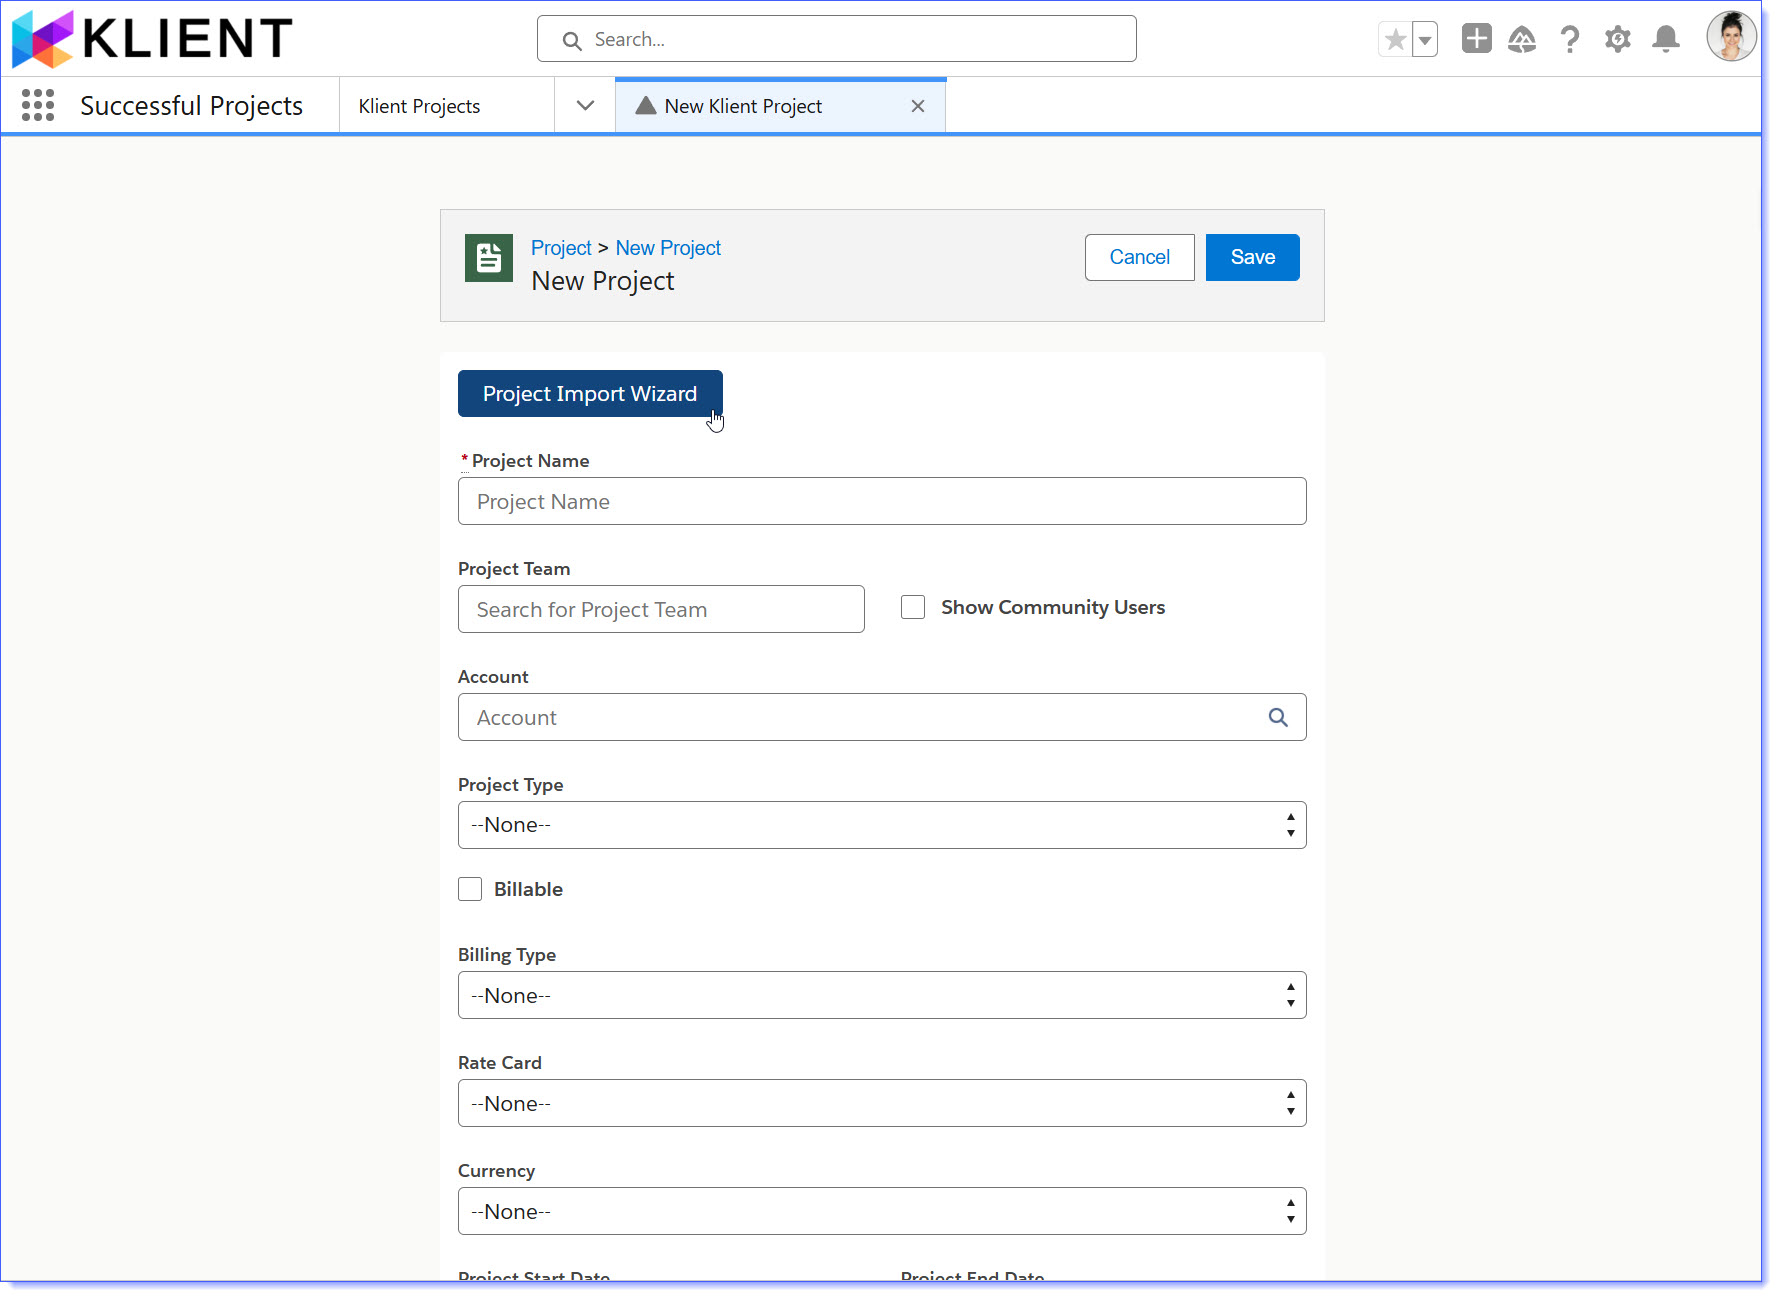
3- Launch the Project Import Wizard
Access the wizard when creating a new project or through the Workspaces Action Menu to apply your templates.
With these steps, you’ll have a reusable template that evolves and improves with each iteration, helping you streamline project setup and maintain consistency across your projects.
RELATED INFORMATION
- Project and Task Templates (article)
- New Project – Import UI – Projects & Templates (release note 49.7)
- Klient Marketplace (release note 49.7)
- Estimate with Project Templates (video)
- Harness Your Business Knowledge with Project Templates (video)
- Successfully Onboard Employees with a Structured Project Template (video)
If you like our Feature Spotlight, you might be interested in our Klient Tips series:
View All Klient-Tips

Found this helpful?
Here are some similar articles in our serie Klient Feature Spotlight

